Pickle It, Dry It, Ferment It: How Indonesian Cooks Make Garden Greens Last All Year
If you've been growing Indonesian leafy greens in your backyard — kemangi, katuk, cassava leaves, or any of the aromatic herbs that make Southeast Asian cooking so distinctive — you've probably hit that late-summer wall. Too much of everything, all at once, and no good plan for what to do with it.
Here's the thing: Indonesian home cooks have been solving this exact problem for generations. Long before refrigerators showed up in rural kitchens across Java, Sumatra, and Sulawesi, preservation wasn't a hobby — it was just how you ate. Pickling, drying, and fermenting weren't trendy techniques. They were survival skills that also happened to produce some seriously delicious food.
The good news? You don't need a lot of special equipment or a culinary degree to pull these off. Let's walk through each method, what it works best for, and how to actually do it in a regular American home kitchen.
Why Preservation Changes the Game for Indonesian Greens
Most Indonesian leafy greens are tender and fast-moving. Kemangi (Indonesian lemon basil) wilts within a day or two of harvest. Cassava leaves need to be cooked quickly or they lose their texture. Even heartier options like sweet potato leaves don't have the refrigerator shelf life of, say, kale.
Preservation extends your harvest window dramatically. More importantly, it transforms flavor. A pickled sambal green isn't just a preserved version of the fresh thing — it's a completely different condiment with its own depth and complexity. Dried kemangi becomes an aromatic tea herb. Fermented cassava leaves develop a savory funk that makes them more versatile, not less.
Think of preservation as a flavor investment. You put the work in now, and you get paid back in January when you crack open a jar and your kitchen suddenly smells like a Balinese warung.
Pickling: The Fastest Way to Build a Condiment Pantry
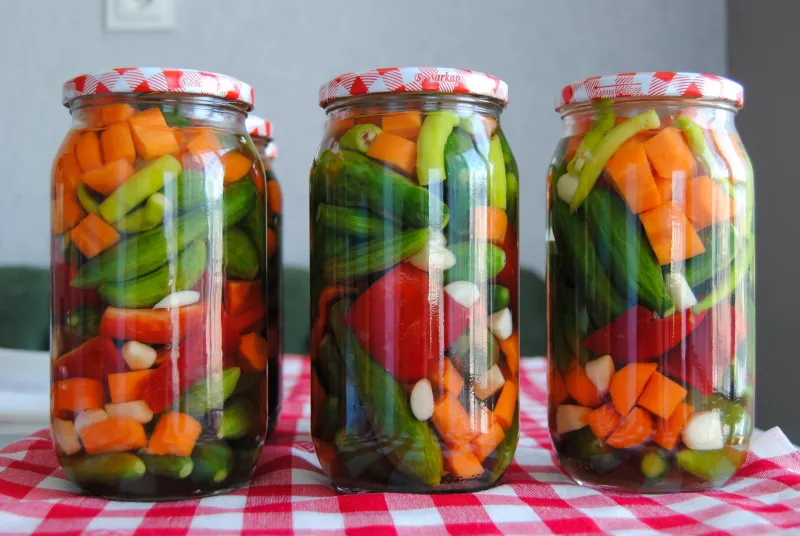
Quick pickling is the most accessible entry point for beginners. The Indonesian version — often called acar — uses a light brine that's more sweet-sour than the punchy vinegar bombs you might know from American dill pickles.
Basic Acar Brine
For a standard batch:
- 1 cup white vinegar or rice vinegar
- 1 cup water
- 2 tablespoons sugar
- 1 teaspoon salt
- Optional: a few slices of fresh turmeric or galangal
Bring everything to a simmer until the sugar dissolves, then pour over your prepared greens in a clean jar. Seal and refrigerate. Most quick pickles are ready within 24 hours and keep for two to three weeks in the fridge.
What to pickle: Young cassava leaves work beautifully here, as do the stems of water spinach (kangkung). For a sambal-adjacent condiment, try pickling a mix of green chili, shallot, and a few whole kemangi leaves together. That combination makes an insanely good topping for grilled fish or fried tofu.
Common mistake: Using too much vinegar. American pickle recipes often skew sharp, but Indonesian acar should taste balanced — you want brightness, not pucker. Start with equal parts vinegar and water, then adjust from there.
Drying: Turning Fresh Herbs Into Pantry Staples
Air-drying is the oldest preservation method in the book, and it works exceptionally well for aromatic Indonesian herbs that you want to use in teas, spice blends, or slow-cooked dishes.
Kemangi is the star candidate here. Dried Indonesian lemon basil loses some of its fresh citrus pop but develops a deeper, almost floral quality that's wonderful steeped as a tea or crumbled into rice dishes. It's also a great way to preserve a bumper crop before the first frost wipes out your plants.
How to Air-Dry Indonesian Herbs
- Harvest in the morning after any dew has dried.
- Bundle stems loosely with kitchen twine — no more than 8-10 stems per bunch so air can circulate.
- Hang upside down in a warm, dry spot with good airflow. A sunny window works, but avoid direct afternoon sun, which can bleach flavor compounds.
- Check after 7-10 days. Leaves should crumble easily when rubbed between your fingers.
- Strip leaves from stems, store in airtight glass jars away from heat and light.
If you live somewhere humid (looking at you, Gulf Coast and Pacific Northwest), a food dehydrator set to 95-105°F is a more reliable option than air-drying. It also works faster — most herbs are done in 4-6 hours.
Pandan leaves can also be dried and ground into a powder that adds subtle coconut-adjacent sweetness to baked goods. It's a niche technique but absolutely worth trying if you have a pandan plant.
Fermenting: The Advanced Move With Big Rewards
Fermentation is where things get genuinely exciting — and a little intimidating for first-timers. But the Indonesian approach to fermenting greens is actually pretty forgiving compared to, say, making kimchi or sourdough.
Fermented Cassava Leaves (Daun Singkong Fermentasi)
This is a traditional preparation from parts of Sumatra and Kalimantan. The fermentation process softens the leaves, reduces bitterness, and creates a slightly tangy, deeply savory base for stews and curries.
What you need:
- Fresh cassava leaves, stems removed
- Non-iodized salt (iodized salt can inhibit fermentation)
- A clean glass jar or ceramic crock
- A weight to keep leaves submerged
Steps:
- Blanch cassava leaves briefly — 2 minutes in boiling water — then drain and cool completely. This step is important because raw cassava contains cyanogenic compounds that need to be reduced before fermentation.
- Pack leaves tightly into your jar, sprinkling salt between layers. Use about 2% salt by weight (roughly 1 teaspoon per pound of leaves).
- Press down firmly and add a small zip-lock bag filled with water as a weight to keep everything submerged.
- Cover loosely with a cloth and leave at room temperature (ideally 65-75°F) for 3-5 days.
- Taste daily starting on day 3. You're looking for a mild tang and a softened texture.
- Once fermented to your liking, seal the jar and move it to the refrigerator, where it will keep for several weeks.
Troubleshooting: If you see white film on top, that's likely kahm yeast — harmless but worth skimming off. If you see fuzzy colored mold (pink, black, green), discard the batch and start fresh. Make sure your leaves stay submerged and your salt ratio is correct.
Putting It All Together: A Preservation Schedule
If you're gardening with Indonesian greens, here's a rough seasonal approach for US growers:
- Late summer (August-September): Pickle and quick-ferment while harvests are at peak. Focus on cassava leaves, water spinach, and chili-heavy acar.
- Early fall (October): Dry your herbs before frost. Kemangi, pandan, and any remaining lemongrass leaves.
- Winter: Enjoy your pantry. Pull out fermented leaves for soups, dried herbs for teas, and pickles as condiments.
Preservation doesn't have to be an all-or-nothing project. Even putting up two or three jars of acar from a weekend harvest is enough to change how you cook through the colder months. Start small, get comfortable with one technique, and build from there.
Your future winter self will absolutely thank you.